Happy Heartfelt Creations Wednesday! It is officially winter here in Northern Indiana. We got about 8" of snow last night. It had rained yesterday afternoon and then all that water froze turning to ice and then we got all this very heavy wet snow. Several trees and power lines came down, but luckily we always had power. The kids had a 2 hour delay today from school and were excited about getting to sleep in. It definitely is beginning to look a lot like Christmas around here! Today I am sharing two card I made that have a Christmas / Winter theme. Check out the other beautiful projects made by the other Design Team members on the Heartfelt Creations blog!
PEACE DOVE

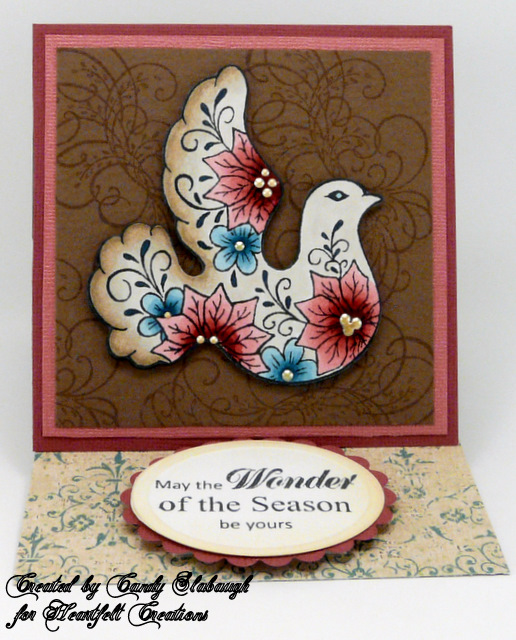
- HCPC 3421 Dove of Peace PreCut Set
- HCD 715 Christmas Cheer Die
Other Products:
- Paper: Cryogen White, K&Company, Recollections
- Ink: Memento - Tuxedo Black
- Copics: E40, E42, E43
- Embellishments: Ribbon, Ranger Liquid Pearls - Silver Pearl, Ranger Perfect Pearls Mists - Perfect Pearl
Instructions:
Card Size 4 1/4" x 5 1/2"
Start with A2 card made out of Kraft colored Recollections paper. Cut a 4" x 5 1/4" piece of patterned paper and adhere to card base. Next take a 1" wide ribbon and wrap around card front and finish off with a bow. On Cryogen White paper with Momento ink stamp the Heartfelt Creations Dove of Peace and color with Copics. Cut Dove out with Heartfelt Creations Christmas Cheer Die and then spray with Perfect Pearls Mist. Use Ranger Liquid Pearls - Silver Pearl for the eye of the Dove. After it is dry adhere Dove on card front with pop dots.
COUNTRY SPRUCE TREES

Heartfelt Creations Products:
- HCPC 3432 Magnificent Spruce Trees PreCut Set
Other Products:
- Paper: Cryogen White, Lily Bee Design - Jingle Egg Nog, Recollections, Bazzill
- Ink: Ranger Distress Ink - Walnut Stain & Old Paper
- Copics - YG99, YG97
- Embellishments: Twine, Button
Instructions:
Card Size 4 1/4" x 5 1/2"
Start with an A2 card base made from brown Recollections cardstock. Next from the striped side of the Jingle Egg Nog paper cut a rectangle 4" x 5 1/4" and adhere to card base. Then from the snowflake side of the paper cut a 1 1/2" x 4" strip of paper and wrap the twine around it several times and then finish it off with a button. On Cryogen White paper with Walnut Stain Distress Ink stamp the small set of trees from the Heartfelt Creations Magnificent Spruce Trees set. Color trees with Copics. Cut a 3" x 2 1/4" rectangle around trees and distress edges with Old Paper Distress Ink. Mat on 3 1/2" x 2 3/4" piece of Bazzill cardstock. Attach to card front with pop dots.